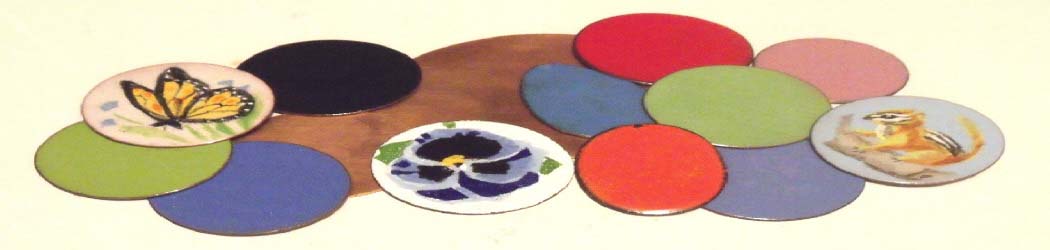
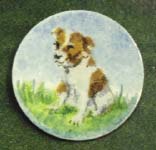
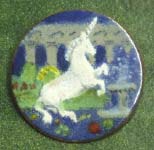
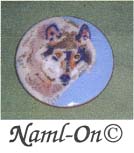
The Naml-On© Color Controller will allow you to create
immediate enamels like the ones illustrated.
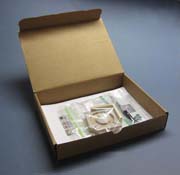
The Naml-On© Kit #1 created for those who have had some enameling
experience, comes with the Naml-On© Color Controller, synchronized Mylar grids, and
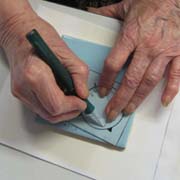
templates of two of Stevie's designs. These are exact copies to
be traced on to the Mylar grids with a fine point permanent marker. A
suitable marker is also included. An X-acto type knife with #11 blades is
suggested for cutting the overlays out of the Mylar film.
To see the Naml-On© Color Controller in action, read complete
instructions for it,
A sample palette of enamel colors suggested for Naml-On© Color Controller first time users may be ordered from Thompson's. All other tools, materials and supplies for enameling are available from Thompson Enamel Inc., 650 Colfax Avenue, Bellevue, KY41073 USA]. A basic Naml-On package containing only the Naml-On© Color Controller, an instructional pamphlet, two design templates, and two Naml-On© Mylar grids, may be ordered directly from Stevie.
Naml-On
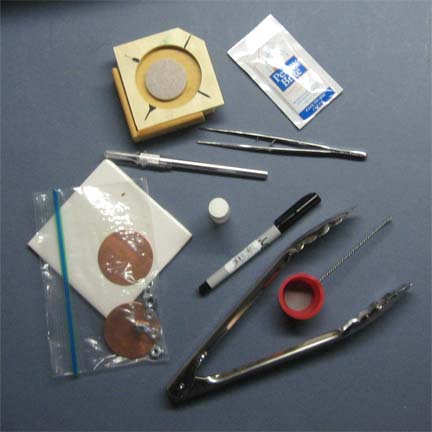
Preliminary instructions for the Naml-On© process How to begin enameling the way I did. For all those who have loved the look and feel of glass on metal, but have not managed to conquer the craft, Naml-On© is for you. If you already have an enameling kiln, or access to one, I can lead you into the wonderful skill of fusing powdered glass to copper. Many years ago I directed a children's summer camp. Since I was an artist, the art program was of prime importance to me. I wanted crafts that would encourage campers to spend time being creative. They also would have things, that they had made, to take home as gifts for parents, or memories of a happy summer. One of the catalogues featured a small kiln, and a kit with the necessary tools for enameling. Cut out copper shapes, little containers of colored powdered glass etc. The instructions seemed simple enough, but the counselor hired to run the studio was unable to achieve results. At the end of the summer the kit was virtually unused. I couldn't waste the investment, so the last two weeks of the camp season, before returning to teaching fourth grade students, I "played" with the enameling kit. To make a long story short: seven years later I sold my first enamel pins to a local high-end gift shop, and was on my way to a career in enameling. My interest was not in becoming an enamellist. Being a painter, my interest was in making the powdered glass on the copper look like specific images. My first attempts were pathetic, but they proved to me that there was a way to accomplish what I wanted. The "way" became Naml-On©. First of all, it is important to realize that Naml-On© is only a first step into enameling. It is limited to what I have discovered. You will be able, very quickly, using my designs and my Color Controller, to have items like the ones pictured below. Besides the use of a kiln [preferably an electric box type one], you will need a few items: A firing fork, a firing rack, tongs, two three-pronged trivets, two 80-mesh sifters, a pair of long handled tweezers and kitchen-type metal tongs. Extra trivets and firing racks can come later. I started out using the bare minimum of equipment. An adhesive liquid, such as Klyre Fire, available at Thompson Enamel, will also be needed. Now to really begin: I suggest
six or more pieces of commercially stamped 2" copper circles. [When you
become familiar with this technique, different shapes and sizes will be just as
suitable. Although Naml-On© is my individual way of working, and I can tell you
what tools I use, there is still need for some
work and concentration. Though more simple to understand than most enameling
introductions, it is nevertheless, a learned skill.
A worktable should be near the kiln. I use one
about two feet wide and four long. [Desk size and height]. The kiln needs a
sturdy support, near the same size, with a heatproof tray or covering next to
it. This provides a place to set down hot firing racks or pieces when lifted
from the kiln. Ordinary white paper should cover the surfaces
where you sift enamel powder on to the copper pieces. Clean the copper. Very important! This becomes relatively easy with the use of Penny Brite, a commercial copper cleaner/polisher. With a little serous rubbing the oily film retained from the manufacturing process is removed. This may also be accomplished by bathing copper in a solution of salt and vinegar. Copper retains an oily film from the manufacturing process. If this is not completely removed, the glass will not adhere to the metal after firing. Many disappointments from flaked off glass are the result of careless cleaning. A satisfactory method is to scrub the surfaces of the copper thoroughly on both sides with a non-metal scrubber. When the copper piece looks clean and shiny, drop it in a solution of vinegar and salt, one part salt to eight parts vinegar. The solution may be kept in a non-metal covered container until it turns blue and loses its strength. A container of plain water is also necessary. Wait about an hour before removing a piece from the vinegar solution. Although this is a mild kitchen-type acid, it can be irritating to skin and detrimental to clothing. Using copper or plastic tongs, (do not use any metal other than copper) lift one piece out. Dip in plain water, dry with clean cloth or paper towel. It is best, when beginning, to ready one piece of copper at a time. Leave others in the solution. A few hours won't hurt. Too long will cause copper to have a pitted surface. I no longer use the above method. Penny Brite, a commercial copper cleaner /polisher readies the copper for the application of the powdered glass almost immediately. A good scrubbing with it and a dip in warm water does the trick. Before turning on the kiln for the first time, practice using the firing fork to lift a rack with a piece of copper on a trivet, into the cold kiln. Get the rhythm of opening the door to the firing chamber with one hand, while supporting the rack on the firing fork, and carefully placing it on the floor of the kiln then sliding the fork out and closing the door. This is a slow and controlled motion. The craft of enameling is a slow deliberate process. When comfortable with the placing and removing the copper from the kiln, turn it on. The kiln takes about an hour to come up to a firing temperature of approximately 1400° F. Copper oxidizes, or loses its bright surface quickly when exposed to air so the next step is to rinse it in water, then dry with paper towel, or cloth, and set the piece on one of the three-pronged trivets. Bring the trivet with the copper to your worktable. The backside of the piece should be up. You can determine the back by the very slight ridge around the edge. Next, with a soft Yz" watercolor
brush apply a coat of adhesive. Klyre Fire is the adhesive sold by Thompson
Enamel Inc, and the only one I have ever used. The adhesive should lie flat and
smooth on the copper. If it
shrinks away from the edges, or forms patterns, the copper is not clean enough
and must be scrubbed again.
Fill a sifter with a small amount of
counter-enamel. This is a powder composed of a mixture of colors. To begin,
counter-enamel may be purchased from Thompson. I save all of my waste colors in
a wide-mouthed glass jar. to be used as needed, and leave one of my sifters in
it. Hold the sifter basket over the copper piece and tap it gently to cause the
powder to cover the copper. [I go around the edges and circle in to the center].
When no copper is visible, pick the piece up by the edges, very gently and place
it on a trivet. Be sure your kiln is up to correct firing temperature [about 1400 degrees F]. Put trivet on firing rack, lift with firing fork, open kiln door and place in kiln. Remove after approximately two minutes. The enamel should be shiny and smooth. After a minute, dip in a container of water to remove most of the fire scale from the other side of the disc. Then scrub with the scouring pad, when the piece is as clean as possible return it to trivet, brush on adhesive and sift on the color you have chosen. Try to keep the powder very even and slightly more than post-card thickness in depth. Let dry for a few minutes. Since the first firing should have burned off any oil on the exposed surface of the metal [called annealing], this other side should fire successfully. Return to kiln for second firing of the color you have selected. Another two minutes should be sufficient. I tap the sifter, on the edge of my table to clear it of the color just used. This is very important, because one doesn't want to contaminate other colors when dipping into their containers. That is the reason for always using a separate sifter for counter enamel. When you begin enameling it is best not to attempt to save colors that have fallen on the paper below the trivet. Often tiny specks of counter enamel may also have also fallen. It's a good idea to let a freshly "powdered" piece dry a little before firing. Now it's the moment of truth. Most kilns have rheostats so that one can set a dial to maintain a constant heat. A pyrometer is more accurate but not necessary. Carefully one opens the door to the firing chamber, while, at the same time, lifting the firing rack with the firing-fork, and very gently placing it on the floor of the kiln. Remove the fork by sliding it out from under the firing rack, and close the door. (This is the step you practiced prior to turning on the kiln.) Patiently wait two minutes, and then check your first effort. The glass should be quite smooth and glossy. Sometimes another 20 seconds, or so, may be necessary. A minute timer with an audible bell is very helpful. After removing from kiln, if the piece sticks to the trivet, tap trivet lightly to release it. Once you have mastered the technique of
successfully " fronting and backing" your copper pieces, you are on
your way to becoming skilled in the art of copper enameling. And you are ready
to use my Naml-On© Color Controller.
Please feel free to Email me, or write, with
any comments or questions you may have about Naml-On©. Ordering is
easy Naml-On
OR
You
Can Order on Our Easy to Use Pay Pal Shopping Cart
Price
List 7/01/2010 Subject to change
Naml-On© Introductory Kit $56.00
|
|||||||||||||||||||||||||||||||||||